Have you seen Elementor?
Our flagship product, Layers has been acquired by the team at Elementor.
With a powerful, fast page builder, Elementor is the best way to get your site online with as little effort as possible.

Start by clicking on in the left-hand admin menu and choose .
All Obox Themes come with some General options for setting a custom logo and favicon, configuring which meta to show, and other customization options like fonts, social media and more. Below is an overview of each tab:
General Options
Custom Logo
Favicon
 This option allows you to upload a favicon, which is the tiny icon displayed in the browser address bar when visitors view your site. The dimensions should be 16 x 16 pixels. Click on Browse to upload an image file from your hard-drive, or enter the URL of your image file if it is hosted elsewhere.
You can upload as many logos as you like and then simply switch to the one you prefer by clicking on the thumbnail. For best results, your favicon should be a .gif or 24-bit .png. You should not use a .jpg as it will probably not display.
This option allows you to upload a favicon, which is the tiny icon displayed in the browser address bar when visitors view your site. The dimensions should be 16 x 16 pixels. Click on Browse to upload an image file from your hard-drive, or enter the URL of your image file if it is hosted elsewhere.
You can upload as many logos as you like and then simply switch to the one you prefer by clicking on the thumbnail. For best results, your favicon should be a .gif or 24-bit .png. You should not use a .jpg as it will probably not display.
Color Options

Picks comes with two color schemes. Select an option from the drop-down. Dark is set by default.
Custom Login Logo
Click Browse to select a custom login logo, which is displayed on the WordPress admin login page. Recommended dimensions are 326px by 82pxFacebook Sharing Options
This option allows you to disable the theme's OpenGraph support if you are using a plugin that duplicates the feature and does not allow disabling it. If left on, you may set a default site image for Facebook to use if it cannot find a featured image on the page or post being shared. Your image must be at least 200px by 200px. View this article for more on Facebook OpenGraph and how it works in your theme.
Post Meta
These settings control which post meta is displayed in widgets, posts and pages. Note that some widgets have a separate control for showing specific elements and are not affected by these settings
- Date – Uncheck to turn off date. Does not affect events.
- Tags – Check to show tags on single posts.
- Social Sharing – Uncheck to disable sharing on photos and posts.
- Direct Link – Uncheck to disable Direct Link on photos and posts.
Custom RSS URL
Enter the URL to your custom feed, such as Feedburner if you have one. If left blank, the default WordPress RSS URLs will be used.


Home Layout
This secion allows you to choose a layout for your homepage.
Full Width Layout
The full width layout gives you the ability to have a full width layout showcasing your photos in a grid similar to Instagram.
Widget Driven (Advanced)
The widget driven layout lets you determine how to layout your homepage via widgets. Get started by going to → For details on using widgets, see Setup Your Widgets.
Blog Layout
You may prefer to use Picks as a traditional blog. This is achieved by choosing the ‘Blog Layout’ from Homepage layout. Using this page template will display your latest Posts (standard and video) in chronological order.
- Click the image tab to set a layout.
- When finished with configuring Theme Options, go to → and ensure Latest Posts is selected.
Sidebar Layout
Select a layout for your blog page – sidebar on the left, right or full-width (as seen on our demo)
Header
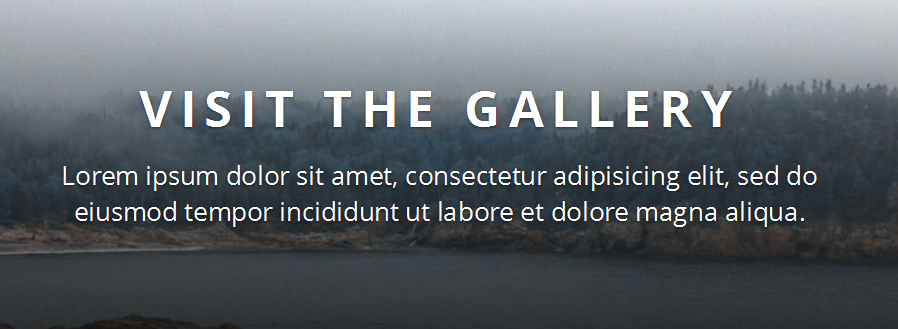
Header Image
If an image is uploaded, the header will appear on all pages except the single posts and gallery categories. Dimensions mentioned here are all suggestions – WordPress is looking specifically for a 2000x520px image so this is the size you should use if at all possible.
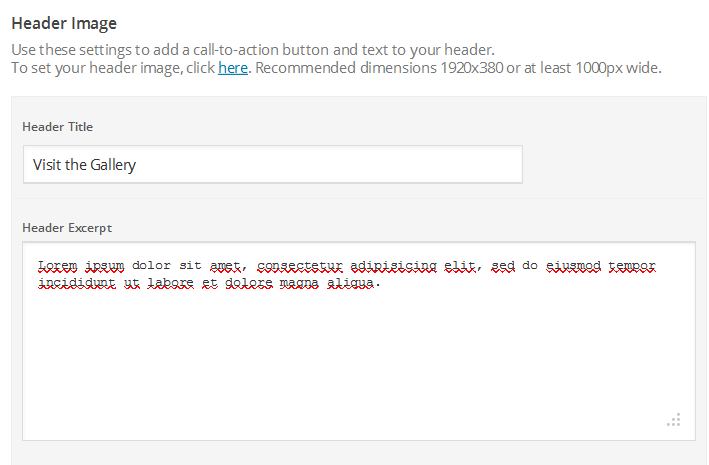
The Header Title and Excerpt work with the custom Header shown on categories and the homepage. The header will contain a thumbnail collage of your latest gallery image uploads by default, or you can upload a Custom Header Image
- Return to the Theme Options and Enter a Title
- Enter an Excerpt
You must have one of these fields entered for the collage header to appear, and no static background set.
Add a Custom Header Image
- Click the link in the option description to open the Appearance → Header page
- We recommend uploading an image of 2000 x 520 pixels as your header image, or at least 1920×500. Click on Choose file/Browse to upload your image or optionally click Choose Image to select an existing image from your WordPress Media Library/Easygram feed.
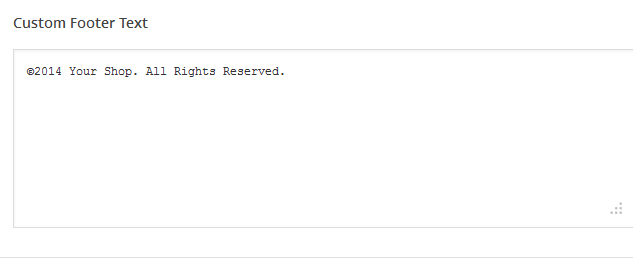
Footer
This section gives you some control over the copyright area of the footer.
Custom Footer Text
All of our themes come with an Obox Logo at the bottom right of the footer. To switch this off, simply uncheck the box (although you get extra awesome points for leaving it on!) You may also replace the default copyright text with your own.
For example: “Copyright © YourSiteName”. Don’t put code in this box, it won’t work!
Site Analytics

If you would like a quick and painless way to implement Google Analytics, paste your preferred tracking code into this text area. Your code will then be inserted into the footer of the theme, which is best for performance reasons.
Learn more about Google Analytics here.
Customization
Social
If you wish to use a social sharing plugin, you can paste the template tag or code in the box provided.
[TO – Socialcode]
Social Icons
The social icons display in the sidebar or footer of the Picks layout depending on where you choose to place the widget. Enter the full profile URL of each relevant social network in the fields provided.
Save your options by clicking the Save Options button in the top-right or bottom-right corner.

