Have you seen Elementor?
Our flagship product, Layers has been acquired by the team at Elementor.
With a powerful, fast page builder, Elementor is the best way to get your site online with as little effort as possible.

The Product post type allows you to list and categorize your products, and ties in with the WooCommerce shopping cart and review system. For best results, add at least three products to test the theme, or load your theme’s demo content (linked from the Create Your Content article)
The following will walk you through the basics of the Product post interface as of WooCommerce 2.1 or later.
For detailed documentation on the WooCommerce product panel, including how to setup Attributes and use Advanced options, visit the WooCommerce Product Guide.
Begin by going to to →
Quick Setup of Simple Products
These steps outline basic setup of a simple product:
- Add a Product Name
- Add a short bit of text to the post editor describing the product, if you wish
- Under the Product Data section, enter an SKU(if tracking stock) and Regular Price
- Enter your , , (Upsells) and where needed
- If your main post entry is long, enter a Product Short Description, which is just like a post Excerpt.
- Click to upload or select a featured image
- To add additional images to the post to display as thumbnails or to create a product slider (depending on your theme’s design), click
- Add some product tags and select or create a Product Category
- Click Publish
Detailed Overview of Add Product screen
Title
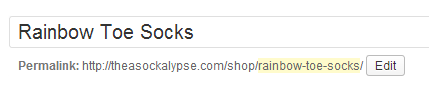
Add the product name in the Title field. Try to keep this short and sweet, as Google will cut off anything after 80 characters.
Below the title is the Permalink. Check the Slug (the part after the domain) to ensure it is correct. If you have loaded our demo content, make sure you are creating new product posts, not editing the demo posts! If the slug is wrong or you want to shorten it, click Edit. Slugs must be lower-case and words divided by hyphens ( – )
Body
Enter any copy or product information into the post editor. For best results, keep this brief and do not insert images here (you can insert a WordPress gallery if displaying swatches as long as the thumbnails are small). Attributes such as color, size, etc have a separate place explained below.
Product Image (aka Featured Image)
Over on the right side of the new product post page, click , then click and Select Files to browse to your image and upload it. When finished, select the image and click the Set Product Image button in the lower-right. For details on adding featured images, see this article, or continue below:
Product Galleries or Product Sliders
You may have additional images for your products, such as photos showing a different angle or color. In WooCommerce 2.0 and later, the Product Gallery box is available on the lower-right of the product editor screen allowing you to upload multiple images, which in turn attaches them to the product. These images will display in a thumbnail grid in the Product Gallery box and can be rearranged in the Media Library by selecting “” and dragging and dropping them in the desired order.
How these images display in your theme depends on the theme’s design. Many of our themes create a slider if multiple images are uploaded to the post, whether through Add Media or the Product Gallery option. If your theme has specific support for the Product Gallery, you will have a selector in Theme Options allowing you to choose between the slider and a thumbnail grid. The size of the thumbnails in this grid, and the number of columns, depends on the image width you set in WooCommerce settings under the Catalog tab. Visit the Create Your Content article for specifics on image sizes for your theme.
Uploading Additional Images Using the Media Manager (used for creating sliders)
- Within the product post, click on the Add Media button above the post editor.
- Click Upload Files, then Select Files to browse to your images and upload them.
- Images must be uploaded directly. Selecting images already in the Media Library will not attach them to the post and they will not display!
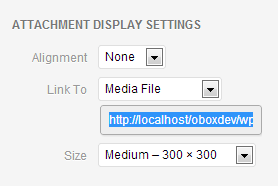
- When complete, click each image to view the image details on the right.
- Edit the image Title
- Ensure Media File is selected in the Link To menu

- Close the Media manager (hit the X in the corner) without inserting any images into the post.
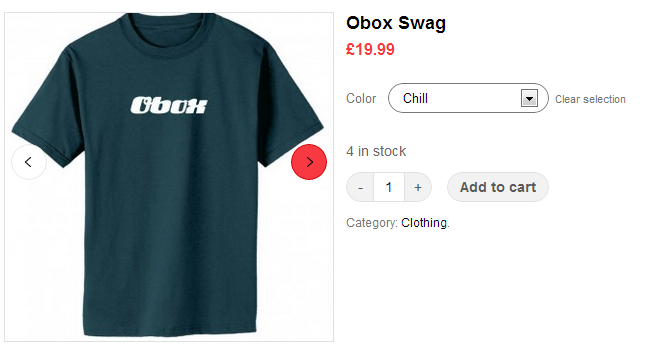
The following example shows the product image slider in CleanSale after 2 additional images were uploaded to the post to showcase the different shirt colors:
Uploading Additional Images Using the Product Gallery (used for creating thumbnail grids)
- Click on images under the Product Gallery box on the right side of the product editor
- Select images or click Upload Files/ Select Files to browse to your images and upload them.
- When complete, click each image to view the image details on the right.
- Edit the image Title
- Ensure Media File is selected in the Link To menu
- Click Add Gallery in the lower-right to close the Media Library
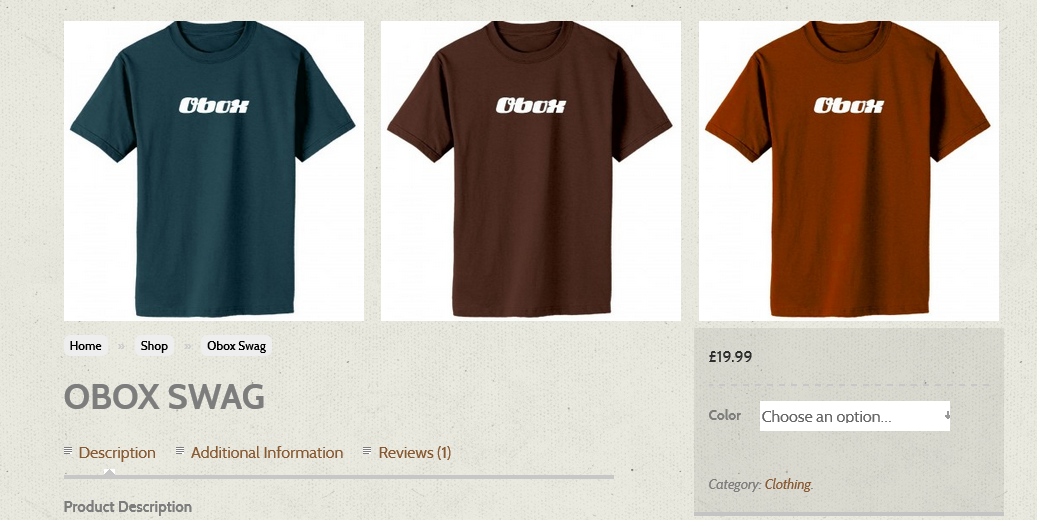
Below shows the product gallery thumbnails in Gigawatt eCommerce with the Product Gallery option selected in Theme Options:
Special note for Variable Products:
Selecting a variation such as a color from the drop-down in a product post will not change the main image unless your theme uses a single featured image, and you have variation images linked for each variation. This is explained more below in the Product Data section.
Product Data
Below the Theme Options panel is the Product Data panel, where you can configure the product:
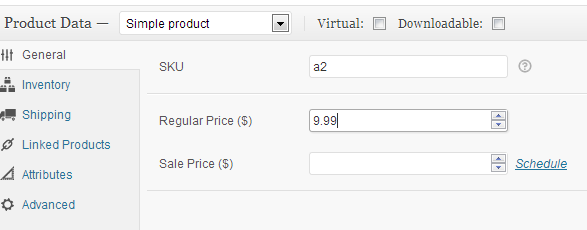
Simple products have no variations such as size or color. These should have the SKU and Regular Price filled in at a minimum. Your SKU is a unique ID for the item that makes it easier to manage your catalog, such as A-1 A-2 and so on.
- Check the Virtual box if your product has no shipping (typically used for services or digital products)
- Select the Downloadable box if your product is digital. You will provide a file or download link later.
- At a minimum, enter the Regular Price
- Select the Tax Status and Class based on your preferences.
Variable Products have multiple sizes, colors or other differences to choose from, but share the same overall style. These are used to keep your catalog tidy, rather than entering a single product post for every variation. Most of your products are Variable products. When selecting Variable Product, the only thing you need to enter on the General tab is the SKU.
For detailed help on creating Variable Products, go to How to Setup Products with Multiple Options(Variations)
Grouped Products allow you to create a collection of products under one “parent” item. Grouped products are great for creating products such as a digital album that has several individual tracks for sale which also allows for the purchase of the full (parent) album. This is explained in detail here.
Inventory allows you to manage stock on individual items and it is recommended you enable this on all physical products.
Shipping allows you to enter a weight, length and height for your item, if available. This is shown on the Product tabs when viewing products along with other attributes such as color, size, etc. If you are using a shipping method that looks at weight, a minimum value must be filled in on all products. You may change the weight unit on the Catalog tab in WooCommerce Options.
Linked Products allow you to select specific products to appear on the related product section (Up-Sells) or Cart (Cross-Sells). This is helpful if you want to push special sales or promotions. This is explained in detail here.
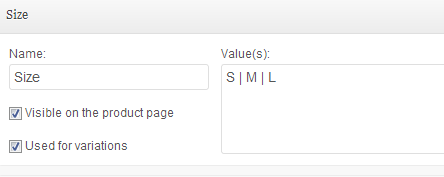
Attributes are where you can select Color, Size etc for the product (ensure Visible on Product Page is checked to display the values on the Additional Information tab of your product post).
- If this is a variable product, separate each selection with the pipe | when adding new values. Example: Red | Blue | Black
- Check “Used for Variations” and then click Save attributes.
Advanced allows you to add specialized product notes (you would use this if an item has an especially long shipping time, for example) and to enable or disable reviews (enabled by default). Note that reviews can also be enabled or disabled using the traditional method just like enabling or disabling comments on posts.
Variations are where you enter specific information related to each combination for your products with additional info such as color or size. First, click on Link All Variations. This will take the attributes you have already entered where “Used for Variations” was checked, and will create a product panel for each combination. You must enter the individual stock, weight, dimensions and price, etc for each item. This allows you to track stock separately under a single sku/item while being able to put specific colors or sizes on sale and so on.
If you want menu selections in the product to change the featured image, you must add a Variation image by clicking the thumbnail, then selecting or uploading the image from the media library. This is only available on layouts with a single image – variation options do not affect product galleries or sliders.
Learn more about Product Variations on the WooCommerce website.
Tags
Enter some Product Tags. Tags are an alternative method of filtering or navigating products for your customers. You can preset tags under Products Tags to help keep them consistent. Good examples of tags are colors in the product, materials or fabrics, make or manufacturer, style indicators (vintage, hip, modern, sleek etc), brands or cut (crew, boatneck, etc)
Categories
Select the Product Category your product belongs to, or create a new category by clicking on (Enter the Category name and hit enter. )
When complete, click Publish

