Have you seen Elementor?
Our flagship product, Layers has been acquired by the team at Elementor.
With a powerful, fast page builder, Elementor is the best way to get your site online with as little effort as possible.

Your theme comes with a Portfolio post type for showcasing showreels, design, art, photos or any body of work that can be represented with images or video. Portfolio items can be arranged by logical categories similar to “albums” that help viewers filter results on your portfolio page.
Themes with a portfolio slider do not support featured videos on single portfolios.
Setup Categories
- Go to →
- Enter the category name and click Add Category
- Repeat to add more categories. The theme is designed to handle one level of categories. For example: Web Design, Print and Full Motion
Add a Portfolio Item
- Click the →.
- Add a title for your item
- Enter any text into the post editor. For best results, keep this brief and do not insert images here.
- Click in the right sidebar of the post editor (or, for themes that support featured videos, add an oEmbed URL to take advantage of auto-thumbnails, not a video embed code)
- Click on Add Media to upload additional images for display in the portfolio post or slider.
- When complete, click each image to view the image details on the right.
- Edit the image Title
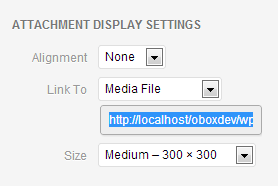
- Ensure Media File is selected in the Link To menu

- If still open, Close the Media manager (hit the X in the corner) without inserting any images into the post. They only need to be attached/uploaded to the post gallery.
- Choose a category under the Category box at right.
- Click Publish. This button will change to Update once a post has been published once.
You can change the order images appear on the portfolio post by dragging and dropping them in the Media Manager.
Creating a Gallery Slider in your portfolio post
You may have additional images for a single portfolio such as photos showing a different angle or detail
How these images display in your theme depends on the theme’s design. Many of our themes create a slider if multiple images are uploaded to the post, otherwise they will be shown in a list.
Uploading Additional Images Using the Media Manager
- Within the product post, click on the Add Media button above the post editor.
- Click Upload Files, then Select Files to browse to your images and upload them.
- Images must be uploaded directly. Selecting images already in the Media Library will not attach them to the post and they will not display!
- When complete, click each image to view the image details on the right.
- Edit the image Title
- Ensure Media File is selected in the Link To menu
- Close the Media manager (hit the X in the corner) without inserting any images into the post.
- Do not click Insert to Post
- Do not create a WordPress Gallery and insert it
Create the Portfolio Page
The Portfolio page template creates a gallery of your portfolio items in chronological order, with a category menu along the top. Clicking a portfolio thumbnail will open the portfolio post where visitors can view details, additional images, and comment (if enabled)
- Click on → .
- Type the name for your Portfolio page in the Title field.
- Scroll down below the page editor and select the number of Portfolio columns from the Layout drop-down menu. View your theme’s demo to see the difference between these layouts.
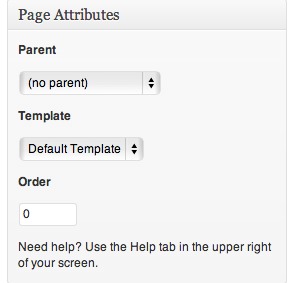
- Choose the Portfolio template from the Page Template menu on the right side.
- Click Publish. This button will change to Update once a page has been published once.
- Go to → and add the page to your menu.