

Introduction
There’s a lot of hype around the no-code movement — a wave of technologies that allow us to build software without code. But code is at the internet’s core. It’s not about the absence of using it to build websites and apps. This movement is actually focused on making it easier (and faster) to code — by making it visual. Meaning, you just design and platforms like Webflow write the code for you.
The following article will help you get started with Webflow
The Solution
What is Webflow?
Webflow is a free flexible content management system(CMS) that allows users to design their own responsive websites, custom blogs, portfolios and ecommerce stores, using html, CSS and Javascript. Webflow is quite similar to WordPress, however, you may find that WordPress has much more restrictions, where you’ll experience more design freedom with Webflow.
Now you can build your entire site in a visual canvas without worrying about having to code. We’ll take you through the signing up process and how to build your own site with Webflow.
How to Sign Up with Webflow
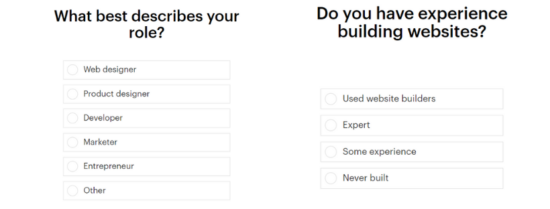
Once you land on the official site, you’ll be able to sign in with your Gmail account or any other email address. Once successful, you’ll be asked a few questions to customise your experience.
For example:
You will then be redirected to a design interface where you can begin building your very own custom website. We’ll take you through all the steps below.
The Designer- Main Interface: Explaining Key Terms
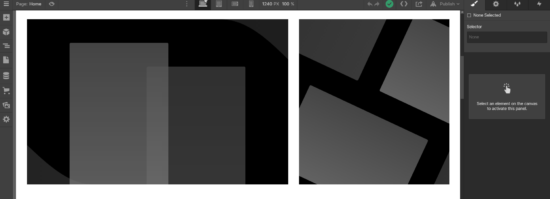
Once you’ve signed in successfully, you will land on the main designer interface. This is where your web design journey begins. If you’ve ever used photoshop, you will notice that this interface looks similar. To help, we’ve labeled each of the main features on the designer interface and its purpose in helping you build your Webflow website.
1. Navigator
The navigator will help you structure each page. It is an overview of all the elements such as the images, text blocks and divs. Think of the navigator as layers in Sketch.
2. Pages
The pages tab will give you an overview of all of the pages on your site as well as their details. You can decide whether to duplicate or add new pages into a folder to structure your work/projects. Although folders are great for structuring, please bear in mind that it will be added to your URL. So take this into consideration when deciding.
3. SEO
Once you’re in the Pages tab, you will also have access to the SEO (Search Engine Optimization) feature. Hover over your page and click on the settings icon to add SEO and OG tags. You may also add custom code in this field.
4. Assets Manager
Here, you will be able to view all of the assets you have used within your projects. This includes images, icons, docs etc.
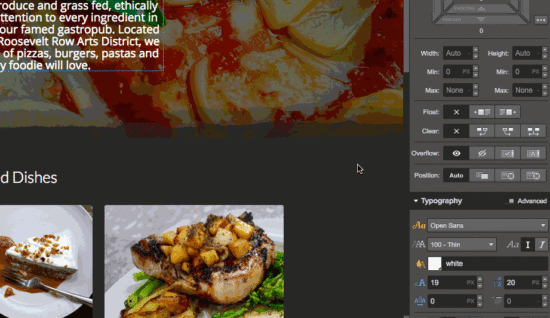
5. Style Panel
You can work with all of your elements within your project in the style panel. This includes margins, colors, text sizes and positioning. While in the style panel, you will also be able to add CSS class/classes in the Selector field. The style panel will help you style multiple elements in one place.
6. Element Settings
The Element settings tab is only tied to one item, unlike the style panel. Here, you will be able to set where a particular button links, how a collection should filter etc.
7. Interactions
The interactions tab is one of Webflow’s most notable features. Here, you will be able to set up animations and transitions for your new project. However, this is an advanced feature, so we doubt you’ll need it for your very first project.
8. Device Check
Lastly, the device check on the right is where you will be able to test different devices on your website and how it looks on them.
Building Your Site with Webflow
Anyone can decide to create their own website, but creating one from scratch, without the proper tools can been disastrous, and could end up costing you a whole lot of money. We’ve decided to guide you through setting up and designing your own website, from conception to scaling. With Webflow, you can either build your website from scratch (blank canvas) or pick a template (easiest option), which works for users who have little to no design experience. If you’re going with a template, here’s how to get it up and running:
1. Choose Your Template
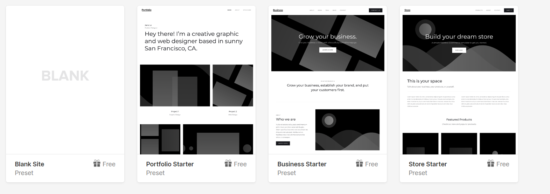
Webflow has an assortment of different templates. In fact, there are over 500 to choose from. This includes a portfolio, event, creative, designer and photography template, among others. Templates are also a great way to learn about web design. You will be exposed to all the elements and learn how they work and come together. Once you choose your template, you will be required to name your project. You will then be taken to the designer interface.
2. Familiarise Yourself with the Template
Now that you have the template. Take a few minutes to familiarise yourself with the main features and design interface we’ve explained above. Once you’ve done this, go ahead and click the + symbol at the top left of your screen and open the Add panel. This is where you will find all of the building blocks of your new website, including all the structura elements, such as sections, content blocks and headings.
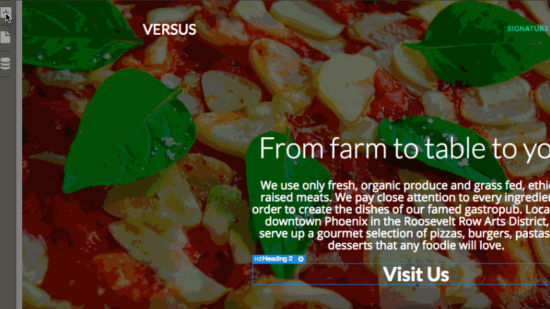
3. Add Content to Your Template

A good practice would be to have all of your content ready before you begin adding your content. The first thing your visitors will see is your home page. You need to add content to your hero section, but first you need to add a hero image. Click on the hero section of the template or on the navigator. You will also see a button on the left-hand side of your screen, this button will show you where you are on the page. Click on the Paintbrush icon in the top right corner to open the Style tab. In the Style tab, you will be able to control the layout and appearance of objects on your page. Now you will be able to swap out the background image with something that is more appropriate for your site.
4. Update Your Text Content
Next, you need to start adding your own copy, starting with a heading (H1). Click on the H1 on your template, then swap out the text with your own. You will now be able to play around with elements. Make sure you have your navigator open while placing elements to make sure you’re placing the div block where you want it.
5. Create a New Style
Now, you need to create a new style for your new text. Go over to the Style tab and click on + sign to add a new one. You can go ahead and name the new style too, and increase the font size. To change the way your lettering looks, you can click on advanced typography and give your letters a bit more breathing room.
6. Make Your Design Responsive
![]()
With Webflow, you will be able to preview your design and check how it looks across devices. At the top of the screen you will be able to preview your site on desktop, tablet, mobile landscape etc. If you’re not happy, you can go ahead and adjust your styling for that particular element.
7. Add a Call-to-Action
You don’t need to use your template’s CTA, you can add your own one. You can do this by dragging a Header from the elements and making an H2. You can also add another section of text. It’s all up to you!
8. Finishing Up
Once your basic website is up, there won’t be many pages to update, however you get to decide how many pages you want on your site. In case you want to add pages, just go to Pages in the left toolbar. Select the page, then update the content and images for each page as we showed you earlier.

