

Introduction
Webflow users long desired to populate their sliders with content from their CMS Collections. It’s now possible to style and add a slider to your project. Slideshows are one of the most powerful and simple components of the Webflow Designer.
This tutorial will show you how to make a simple but dynamic slider on Webflow.
The Solution
What is a Slider?
A slider is a design element that is added to website pages to display visual content. Sliders can be of many sizes, from traditional image slideshows to fullscreen sliders.
Sliders are a favorite of designers because they allow for flexibility and provide visual elements that help tell compelling stories. Site owners love sliders because they allow them to promote multiple aspects of a business in one space and component.
What are Sliders?
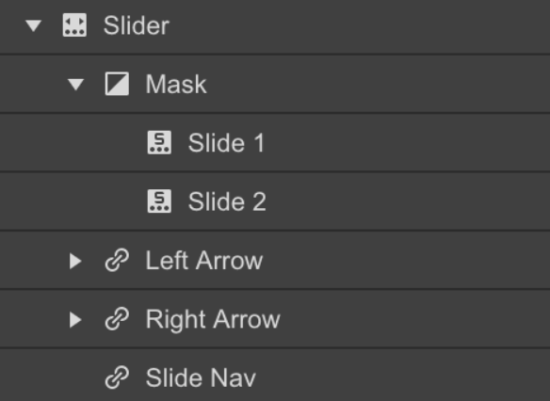
Sliders are added to the canvas in a way that takes up all the width of the parent elements they’re dropped into. After the Slider has been placed on the page, we can see that it has what is known as 4 children. These children are just a fancy way of saying sub-sections.
The four children/sub-sections include:
- The Mask – This contains the two default slides
- The left arrow
- The right arrow
- Slide navigation
How Are Sliders Created?
Conventionally, a slider is made up of two slides. However, you can always add more slides. Once you’re logged into your Webflow account, navigate to the element settings and scroll down to the slider tab.
By default, the Slider has two slides. There are three ways to add slides:
- Click on any slide element then go to Panel for Element Settings
- Click (shortcut: D).+ Add Slide
- Right-click on a slide and choose duplicate
- To duplicate the slide, select the slide in the navigator or on the canvas and copy-paste.
How to Move Between Sliders:
- You can either click on the slider settings arrows or…
- Click on the Slide Navigation dots directly on the canvas
- Click on the slide to open the Navigator Panel
- Once you have selected the slider, press the left or right arrows on the keyboard.
- You can use the slide menu to go to a particular slide in the slider settings.
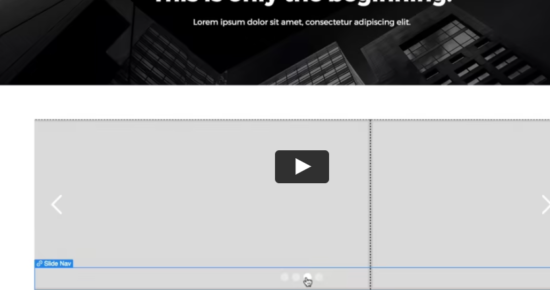
You can Add Background Images to Your Slider
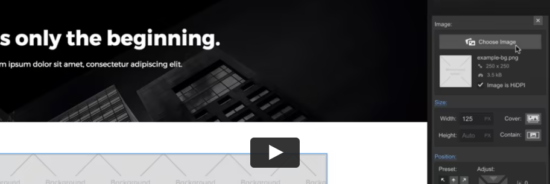
Webflow has a very impressive drag and drop design feature, which makes designing your slider a seamless experience. All you need to do is drag an image element onto a slide. You can go ahead and add a background as well. This will enable you to add content later.
- Firstly, you must choose a slide to create a class.
- Now you can go ahead and add a background photo.
- The background image should be a specific size which will include the position and background image center. Choosing an image that is not sized correctly will look distorted.
You Can Add Content to Your Slider Easily

Slides are able to accommodate additional components, such as div blocks and sections. This enables you to add some dynamic content to your slide. Similar to images, you can drop your slide in the body and add a text container to the slide. Now you can proceed to adding headings and paragraphs to your slider.
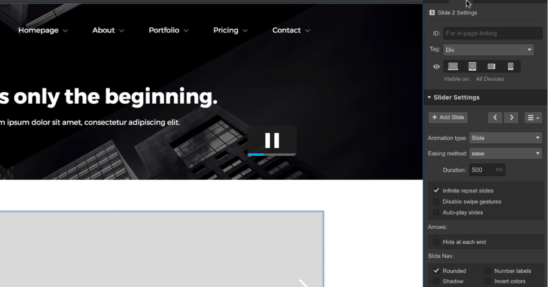
Moving on to Configuring Your Slide
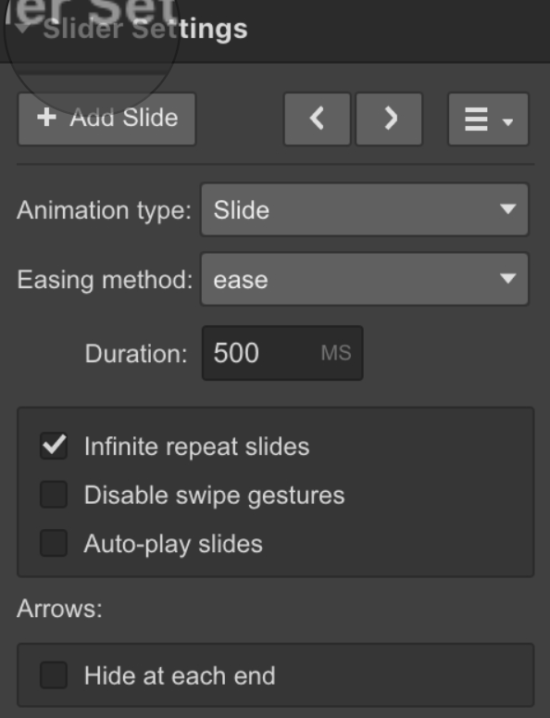
In your Webflow settings Panel, you will be able to configure your slide settings to suit your needs. This includes setting a:
- Animation type – This refers to how slides will appear
- Duration – This refers to the time it takes for a slide to change to another slide.
- Swipe gestures: This allows you to enable or disable swipe gestures for touch devices. This is especially useful if you care about the timing of the slide in your design and your users will be able to manually change your slides.
- Autoplay- Refers to automating the set time it takes for the slide to change and the number of slides it should go through before it stops changing slides completely.
- Slide nav controls: Choose the spacing, shape and inverse colors of the nav buttons.
Customizing Your Slider to Suit Your Preference
Webflow allows users to customize their sliders according to their preferences. We’ve listed a few common ways you can customize your slider for your page.
Sizing
Your slider size can always be adjusted. All you need to do is go to your Style Panel and adjust your slider. The slider size can be adjusted by clicking on the slider and changing the styles panel to adjust it. If you do this, the background image will resize accordingly.
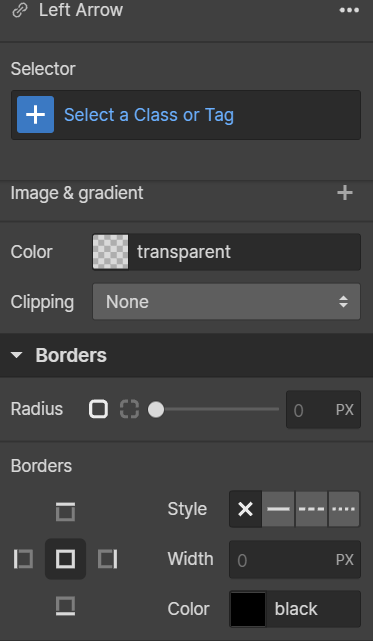
Slider Arrows
Conventionally, the orientation of a slider’s arrows is vertically centered. They look similar to white arrow icons. These steps will allow you to change the appearance of these icons:
- Choose the left arrow or right arrow element
- Assign a class to it
- Change the font size if you wish or the font color. Just remember that the icon’s size will depend on your font size.
How to Display Multiple Sliders Simultaneously
With Webflow, it is possible to display multiple slides at one. All you need to do is add a slide, like we’ve explained to you above. Then make sure that all of your slides are the same class and lastly, the class width should be set to 33.33% for desktop and 100% for mobile. You can display up to three slides at once.

