Have you seen Elementor?
Our flagship product, Layers has been acquired by the team at Elementor.
With a powerful, fast page builder, Elementor is the best way to get your site online with as little effort as possible.

Launchpad comes with its own configuration options, similar to a WordPress theme. Click the link in your admin sidebar to begin.
General Settings
The Basics
To Save your settings as you go through each tab, click the Save button in the upper-right. You may also preview your progress anytime by saving and then clicking Preview. Please note that some settings, such as custom backgrounds, may not appear in the preview.
Activate Launchpad by toggling the Active switch on the main settings tab. Only administrators will be able to view the full WordPress site by default. If you would like Authors or Editors to be able to preview your site, select the lowest role to limit from the drop-down menu. All other visitors will see the Launchpad landing page who do not have the role you select or higher.
Launch Timer
Check Display Count Down Timer to show the timer
- Enter a Launch Date for when you plan to launch your new website (and turn off Launchpad so everyone can see your homepage). Use the format provided in the Launch Date field in the below example.
- Check the Automatic Launch box if you want to deactivate Launchpad automatically when the timer runs out .
Introduction
Check or uncheck the Display Site Tagline box to show or hide the tagline as set under → in WordPress.
- You may also enter a custom Introduction title
- Enter some content in Introduction Copy. Content is pre-formatted by the plugin using paragraphs and should be kept pretty short. Shortcodes and script will probably not work here!
- Intro Video: Video urls from Vimeo, YouTube and any other service that supports oEmbed may be pasted in the Intro Video field to display the video on your landing page. Use the full URL to the video in your browser address bar, not the short url used for sharing, and make sure it has an http:// prefix, not https://
Newsletter Management
You may copy and paste any HTML or iFrame embed code for a signup form here. This must be the “safe mode” version without included javascript. The below example shows a MailChimp signup form code:
For help and support for embedded forms, please contact your newsletter service provider.
Copyright
The final setting on the General tab is to hide the Obox logo and provide your own copyright text, if desired.
To make the copyright symbol (©), hold down Alt and type 0169 then release.
The minimum User Rights selection determines who can see the full site when logged in. Typically this can stay set to Administrator.
Look & Feel
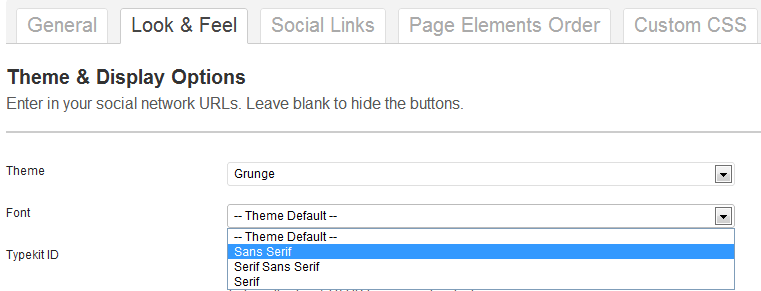
- Choose from one of the default themes. This mainly affects border styles, colors and the countdown timer.
- Select a font style
- Theme Default : stick with our recommendation
- Sans Serif – clean fonts without “nubs”
- Serif – classic fonts with serifs or “nubs”
- Serif Sans Serif – a mix of both
Typekit
Fonts may be further defined via Typekit, Adobe’s professional-grade font service and library with hundreds of thousands of premium fonts. Don’t have an account? You can get a free intro account on the Typekit homepage.
Enter your Typekit ID into the field to connect.
Custom Logo and Background
These options allow you to upload custom logos or backgrounds.
- Check the Enable logo box
- Click Choose File or Browse and browse to your file to select it
- Click the Save Changes button in the upper-right to set the upload.
- If multiple images are set, click one to select it as active and click Save Changes again.
- Check Enable Background and select a preset background image, or upload your own.
- Click Save Changes to upload your image and again after selecting it.
Social Links
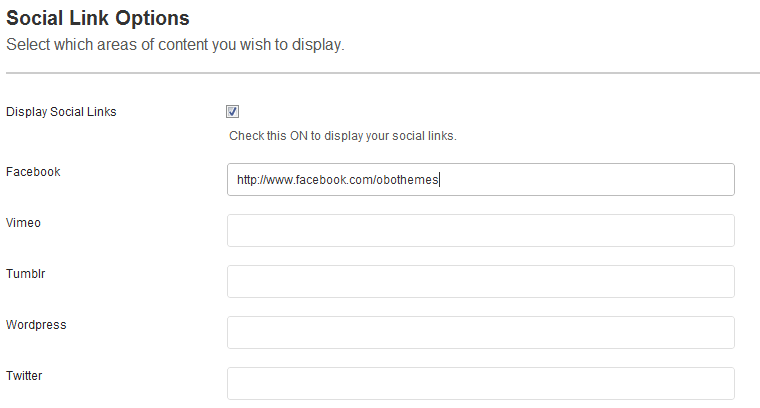
Check the box to enable the social links icons to appear. Enter your full profile URL for each service you wish to show. Launchpad currently supports up to 6 networks: Facebook, Vimeo, Tumblr, WordPress, Youtube and Twitter. To customize which networks appear here, see the knowledgebase.
Home Page Order
You can easily change the order each element appears by dragging and dropping the section labels on this page. Click a label and hold down the left mouse button to drag it into position, then release.
Custom CSS
For those of your familiar with CSS styling, the Custom CSS tab allows you to enter any CSS you wish to customize the page elements. To grab a class, right-click the element and choose Inspect Element (not available in IE)


