

The Solution
eCommerce businesses- You’ve heard all the benefits of email automation? The next step is to decide which software you should use. Most likely, you’re looking for a platform that includes building and managing mailing lists, newsletters and automated marketing campaigns.
A quick Google search for “Email Marketing” might bring up Mailchimp. Perhaps you are already familiar with the name, or maybe you have just read the preview text. Either way, it seems like a good option. We have a suggestion.
Klaviyo is the new kid on the block! This platform is a powerful growth marketing tool. You can build high-value, unlimited relationships via email, mobile, and the internet. It’s not about sending a lot of emails. Your goal is to increase your return on investment (ROI) and make sales.
Klaviyo Pricing
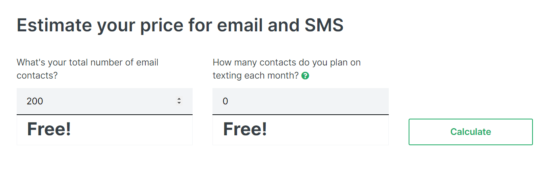
Klaviyo is Free for small businesses who have an email and SMS list below 200 recipients. However, even then, their pricing is fairly cheap, considering its competitors.
We’ll guide you through setting up your email and SMS campaigns below:
Step 1: Signing Up
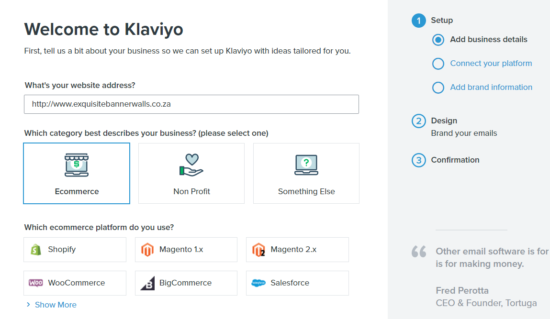
The first step is to set up your account with Klaviyo. You will need to add in your web address, choose a category that best suits your business, and connect it to an ecommerce platform, if you have one. You will then be able to connect your platform and add your brand information.
Step 2: Brand Your Emails
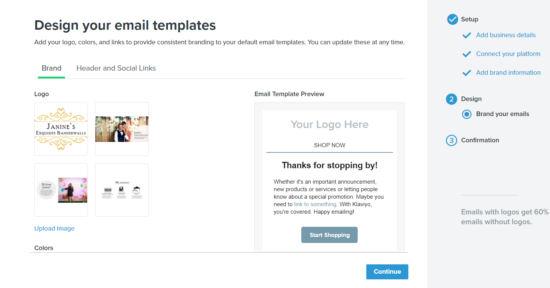
Next, you will be prompted to design your emails. You can do this by adding your logo, headers and links to your social media profiles. Once you have done this click on Continue, to confirm your account.
Step 3: Verification
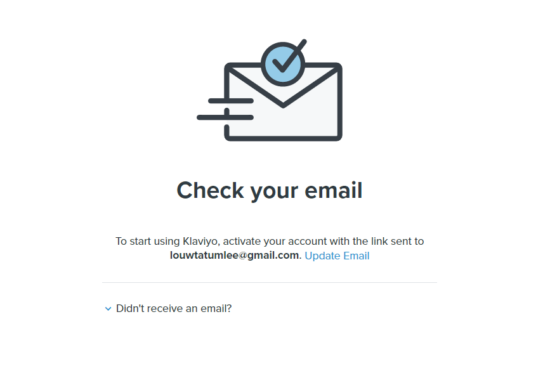
Once you have added your branding information, you will be required to verify your account through the original email you provided.
Step 4: Welcome to Your Dashboard
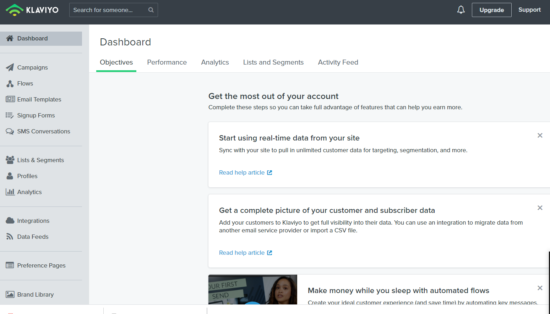
After you have verified your account, you will be redirected to your Klaviyo Dashboard. Here you will see a range of projects which you can begin. But for now we are focused on an email campaign. On the left-hand-side of your dashboard you will see a range of options. Click on Campaign, then you will be presented with two options, click on Email, then Create Campaign.
You will then be guided through the email campaign process.
Step 5: Add recipients
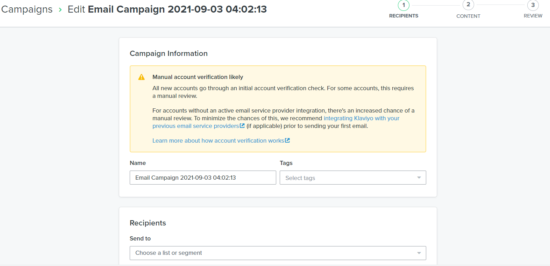
Now, you may wish to add your recipients manually, however, you can import a list if you already have an existing database. On the left side of your dashboard, you will see List & Segments option. Here, you will be able to add your database doc, sheet or file and import it into Klaviyo.
You will then be able to easily add your recipients in the Send to field easily. You will also be able to add different segments, if, for example, you would like to target different audiences in different emails. Then click on Continue.
Step 6: Adding Your Content

Next, you will be able to add your content. Here you will be able to add a subject line, preview text, your email name and a sender email address. Klaviyo also has a very user-friendly interface. You will be able to drag and drop design elements, or you can opt to send your email as plain text. For more advanced users, there is also an HTML element for you to further customise your email
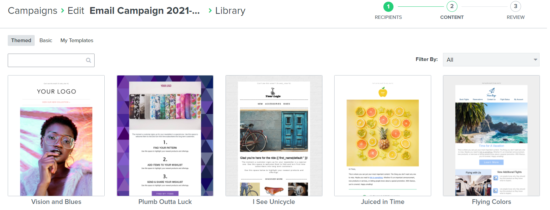
Step 7: Choose Your Template
Once you have decided which design element you would like to use in creating your campaign, you will be taken to an email template interface, where you will be able to choose your template. You can choose between Themed, Basic and customised templates.
Step 8: Start Customising
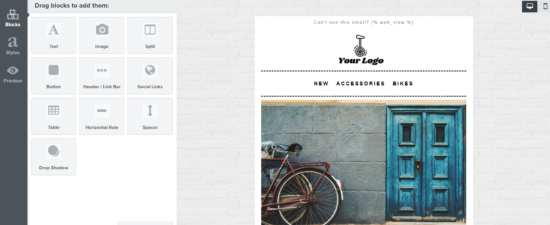
Once you have chosen you template, you can now go ahead and add your different elements.This includes adding texts, images, buttons, tables, spaces etc. These templates are very well structured and offer an impressive guide to constructing your email. When you are happy, you will be able to click on the Preview option on the left-hands-side of your dashboard.
Step 9: Review & Checklist
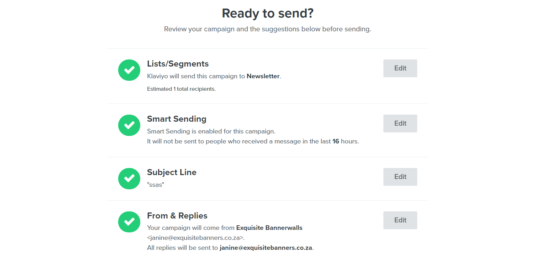
Once you have added your content, you can now continue to review. In the review section, you will be able to revise your content and view how the draft will look like. You will be able to make final changes and then send your email, once you are happy. There is also a checklist you can view to make sure you have covered all of the important facets of your email.
Step 10: Schedule or Send Your Email
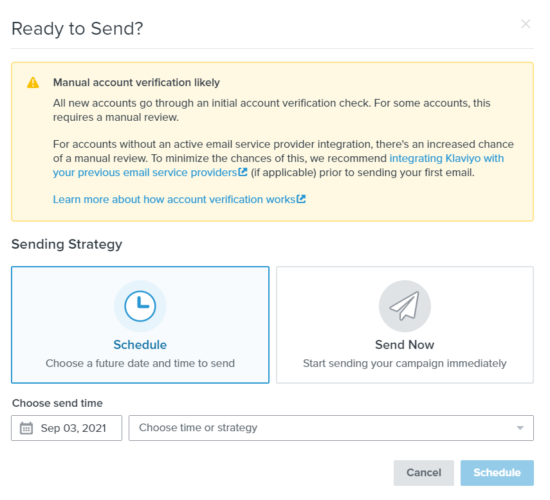
You can now proceed to scheduling or sending your email. Please make sure you are happy with your email before sending, as it is near impossible to reverse sending once it has been processed.
Creating your email campaign is as easy as that, with Klaviyo!
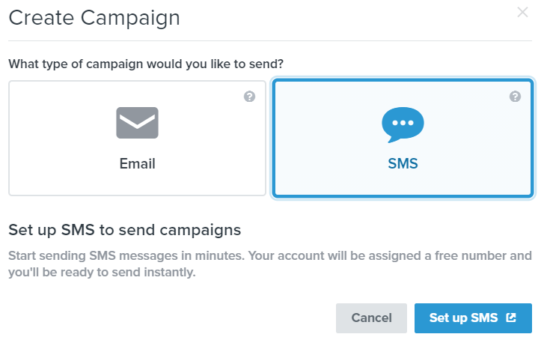
Let’s Get Started on Your SMS Campaign
The signing up process is exactly the same for the SMS campaign. The only thing you would do differently, is choosing a SMS Campaign, rather than an email campaign. Once you click Set up SMS, you will begin setting up you campaign.
Terms & Conditions
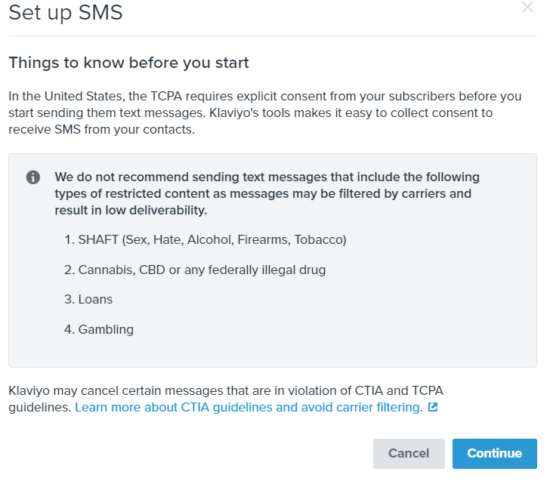
Before continuing, please note that your SMS communication is restricted by the CTIA and TCPA
Configure Your Settings
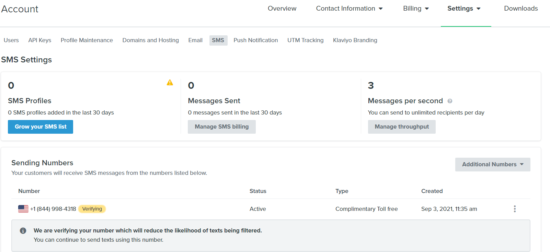
Configuring your settings include growing your sms list, managing your SMS billing and deciding how many messages you will send a day. Please note that Klaviyo does not have any restrictions in terms of numbers for your SMS communications. Secondly, you will have to decide on your sending number. Please choose a working number, as these numbers require verification.
SMS Add-ons

You can choose to add ADD-ons to your SMS communication. This includes opt-out language.
Consent & Keyword Management
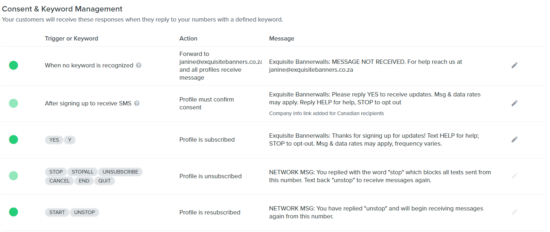
You must add consent or keywords to the SMS campaign. These act as triggers , which means that certain SMS communication will be sent when certain keywords are triggered. Your messages can vary too, based on your keywords and consent.
SMS Sending Settings

You can decide when to send your SMS. You can also decide to skip recipients who have already received a message from you within 24 hours. Another feature you can make use of is attributing purchases and other activities to the most recently clicked SMS sent in the last. Once you have completed these fields, you will be able to schedule your very first SMS.

