Your theme comes with several custom styles you may use to format your posts. The Obox menu in your post editor works similarly to shortcodes, allowing you to create columns, dividers, boxes, buttons, styled headers and so on, but without the confusing shortcode markup. For best results, write your post content first, then go back, place your cursor where you want a styled element to appear, then select an option from the Obox menu to insert the element for editing. For full elements such as columns, drop-caps or other content, you may need to click the Text tab to set your cursor below the closing tag of the element’s container so you can continue your content in a new paragraph.
Using Obox Styles
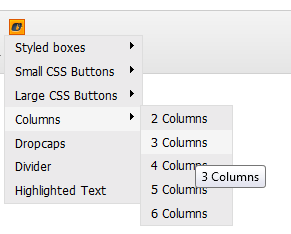
To use post styles, enter all content first, then go back to style/enter elements last. Styles are sensitive to how your text is already formatted, and what you highlight. If necessary, click the Text tab to fix any problems, or remove unwanted line breaks, etc.
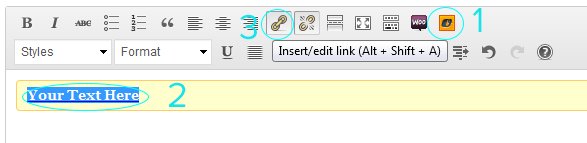
The below example shows a Styled box added to the post editor (prefilled with text) and then a link applied to the text:
To see a preview of all the available styles, visit your theme’s demo page and click on →
Customize the Styles
Use Inspect Element to grab the styles when previewing, or refer to the editor-styles.css. Copy the styles you wish to change into the Custom CSS area in Theme Options Customize tab to edit them (do not edit the original file)