Have you seen Elementor?
Our flagship product, Layers has been acquired by the team at Elementor.
With a powerful, fast page builder, Elementor is the best way to get your site online with as little effort as possible.

Now that you’ve added your content and configured the theme, you will be able to begin customizing what content is displayed in your widget areas. For new WordPress installs, you may need to drag out any default widgets from the widget panels.
Get started by going to →
On the right you will see a number of panels that you can expand:
- Sidebar
- Home Page
- Footer
Each widget specific to your theme has been color coded to make setup easy. Simply drag the widgets you need into the corresponding panels. At the top of the page you will find a yellow ribbon containing a handy “Click Here” link, which will display a recommended widget setup in case you get lost.

Below is an explanation of each widget and how to configure it.
Home Page Panel
This panel accomodates any full-width or orange Obox widgets.
Thumbnail Widget
This widget displays up to 5 images from Albums or Posts from the Category selected (or all of them if left on All) with one post per row.
Important Note about using Posts
This widget is best suited for posts that contain multiple attachments (more than one image uploaded to the post). If you only have one featured image in your posts, or featured videos, use the Large Thumbnail widget instead.
- Enter a widget Title, if desired
- Enter the URL you want the Title to link to in the Custom Title Link field, if desired
- Select what you want to Display: Posts or Albums
- Other content types may appear here, especially if you have plugins that add extra post types. Please note that those types may not work well with this widget.
- Select a filter in the Filter By menu and click Save
- Select a specific category or tag, or leave the default selected and click Save
- Select a number of posts to show from the Post Count option.
- Choose how to order the posts:
- Date orders them chronologically, with the newest on top/left by default
- Title orders them alphabetically
- Random will shuffle them on each page load.
- Comment Count looks at the number of comments to determine popularity
- Manual Order (also called Menu Order) will look at the number entered into the Order field of the post.
- Choose whether to sort Ascending(newest-oldest, 1-10, A-Z) or Descending (oldest-newest, 10-1, Z-A)
- Posts Only: Check the Show Dates option to show the date below the image
- Posts Only: Check Show Excerpts to show the excerpt below the image(and date if enabled)
- Click Save
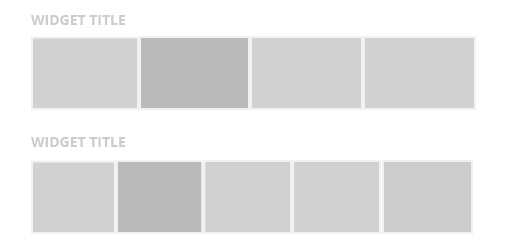
Large Thumbnail Widget
This widget has similar options to the Thumbnail widget, but is designed to show a single featured image or video. This closely resembles the Album post layout.
- Enter a widget Title, if desired
- Enter the URL you want the Title to link to in the Custom Title Link field, if desired
- Select what you want to Display: Posts or Albums
- Other content types may appear here, especially if you have plugins that add extra post types. Please note that those types may not work well with this widget.
- Select a filter in the Filter By menu and click Save
- Select a specific category or tag, or leave the default selected and click Save
- Select a number of posts to show from the Post Count option.
- Choose how to order the posts:
- Date orders them chronologically, with the newest on top/left by default
- Title orders them alphabetically
- Random will shuffle them on each page load.
- Comment Count looks at the number of comments to determine popularity
- Manual Order (also called Menu Order) will look at the number entered into the Order field of the post.
- Choose whether to sort Ascending(newest-oldest, 1-10, A-Z) or Descending (oldest-newest, 10-1, Z-A)
- Select your Thumbnail Preference for how to prioritize your posts’ featured image or video:
- Post Featured Images display the featured image attached to the post, or the oEmbed thumbnail on video posts using the Video URL. Select this if displaying Albums.
- Video displays videos for all posts that have a featured video. Non-video posts will still show featured images.
- Posts Only: Check the Show Dates option to show the date below the image
- Posts Only: Check Show Excerpts to show the excerpt below the image(and date if enabled)
- Click Save
Important Note About Images in Widgets
The thumbnail links cannot be customized and will link to the post by default. If you want to manipulate this functionality to use Pages/page featured images to create image links to specific pages, check out the Page Links To plugin, which allows you to set custom links on a per-post or per-page basis to redirect all links to that page to the URL of your choice.
Sidebar & Footer
You are free to put any widgets you wish into the sidebar and footer area, or leave it blank. Footer widgets are visible on all pages. Experiment to find a layout that suits your website.
The following explains the blue Obox widgets. For help with standard WordPress widgets, see the WordPress Codex.
Author Widget
This widget is designed to display information about you, the author. Use this widget to introduce yourself to your site visitors. Add a title, enter your ‘Gravatar Account’ email address and a description of yourself.
- Enter a Title. This is displayed above your gravatar and description.
- Enter your Gravatar Email address. This will show your ‘avatar’ on your website.
- Enter a description about yourself.
- Click Save
(Obox) Twitter Stream
Display the Twitter timeline. Please note that you cannot customize or change the format of the tweets beyond what the widget offers (this is a Twitter requirement)- Enter a Title such as “Follow Me on Twitter”. This title will link to your profile.
- Enter your Twitter ID without the @
- Click the link to go to your Twitter Profile widget page
- Click Create New, then Create Widget.
- Copy the numeric ID from the address bar URL and paste it below. ie https://twitter.com/settings/widgets/344941445658050562/edit
-
- Select the number of Tweets to show.
- Select whether to display Replies/ Retweets
- Select a default color scheme. When used in the sidebar or any dark background, choose Dark.
- Enter a custom color for the links using an HTML color code (gray by default)
- Enter a widget height to adjust the container height if showing more than 3 tweets.
- Click Save

(Obox) Popular Posts
This widget displays posts links ranked by the number of comments received in all time.- Enter a Title
- Select a Post Count
- Select a Post Category
- Click Save
(Obox) Social Links
Displays icons linking to your social profiles. Enter the full URLs to your social profiles here. For the email field, enter your email address. For RSS, enter your RSS Feed Url or Feedburner URL.(Obox) Comments
Display the latest comments with a short excerpt and link to the post. This differs from the default WordPress widget in how it displays the information.
(Obox) Search
Provides a styled search field.
125x125 Adverts (also called Small Adverts Widget)
Displays 125x125 blocks added under →300px Adverts (Also Called Large Adverts Widget)
Displays 300x250 blocks added under →(Obox) Flickr Photos
Displays small thumbnails from your Flickr feed in a 3 column grid