Introduction
If you’re a fan of Elementor page builder, you’ll know that it goes a long way in making your WordPress website a lot easier to manage and build. Elementor also works great for business directory sites. Although many people may think that taking this route is way more complex, we can assure you that it is possible and very easy to create a custom business listing site with Elementor when you use it in conjunction with the Jet Engine plugin.
You won’t only be limited to creatinine a business listing website, but you can create any kind of directory website you want. Including real estate listings and travel guides among others.
Key Features of JetEngine
JetEngine is a part of JetPlugins, which is basically a set of premium Elemento add-ons developed by Crocoblock. With JetEngine you will be able to create custom content types in WordPress. The JetEngine plugin is specifically designed for Elementor and will enhance your page building experience.
Here are some of the custom content types you are able to create using JetEngine:
- Custom post types
- Custom fields
- Custom taxonomies
- Custom forms
- Listing items
- Dynamic calendar
- Dynamic gallery
- Dynamic map
The Solution
How to Add a Directory Site to Elementor
We’ll guide you through creating an optimal directory site using JetEngine, on Elementor.
Firstly, you need to make sure you have all the proper plugins installed to WordPress and that they are activated. This is very important. Here is a list of the key plugins you need to have installed and activated.
- Classic editor
- Elementor
- Elementor Pro
- JetEngine
- JetSearch for Elementor
- JetSmartFilter
- Windows Compatibility fix
Step 1: Create Your Custom Post Type
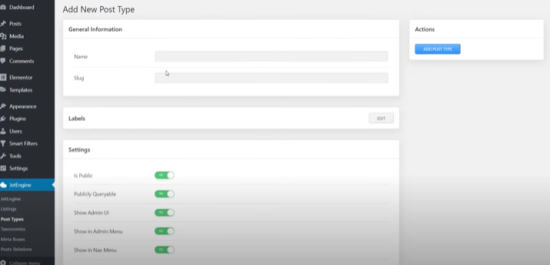
- Go to JetEngine(on the WordPress Dashboard Menu) > Post types > Add new.
- Add the Name of your custom post type and copy this into the Slug.
- Labels- you can leave this in default, however this is optional
- Settings > leave everything as is, BUT make sure you have enabled Hierarchical.
- Set your Menu position to 1 and add your Menu icon or search for an icon you want to use.
- When you get to Support, add a thumbnail to the existing default options already in the field.
- Once you get to Meta fields go ahead and expand the field.
- Add your Title-make it as logical as possible. This is what will be visible in your dashboard. Name/ID – requires a naming convention eg. busines_address.
- Type > Text- If you Meta field is only text, if not choose another option.
- Description > Not entirely necessary, but if you want to give your end-user a description, you may.
- Field width > leave as is.
You can then follow the same procedure for adding another Meta Field. You may want to add a business address, business email, business telephone, business gallery and business strapline- While your business name expresses who you are, your strapline can convey what you do, and why you’re the best option currently on the market.
Step 2: Adding Admin Columns
Admin columns target your meta fields and use them inside the admin column. For example, if your Business Address Meta field is business_address.
- You can go to Admin Columns > Add new column > Title : business address
- Type: Meta Value
- Value form Meta Field: business address
- Custom order: E.g 2. Set this to the same order of the business address meta field.
- Add a Prefix or Suffix is optional.
- Then go to the top right of the page and click Update Post Type. You will then have created your first custom post type
Step 3: Creating Custom Taxonomies
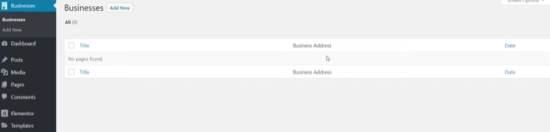
- Now move to the newly created Business Section > Businesses.
- You will then see your business address in the admin column you created and you can proceed to adding more meta fields, which will appear here once it has been created.
- Next got JetEngine > Taxonomies > Add New Taxonomy
- Name > Business Type
- Slug > business_type (stick to the naming convention)
- Post Type( what do you want to associated this Taxonomy with?) > Businesses.
- Customize labels, only if necessary.
- Leave your settings as is, but make sure you change the Rewrite Slug to business_type, and enable Hierarchical.
- If you would like to customize your taxonomy, you can add additional meta fields.
Once you have created your first Taxonomy, you need to add another which is the Business Location taxonomy. You can follow the same steps above to do this. Once you have done this you will be able to see it under Businesses.
Step 4: Setting up Your Taxonomy Entries
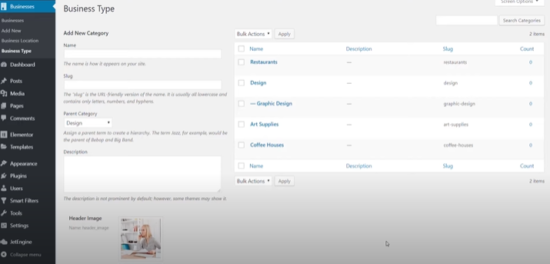
Business Type
- Proceed to Businesses > Business Type > Add new > Name: Art Supplies
- Slug > automated
- Parent Category: None
- Description: Optional
- Header Image > Choose Media > Upload Image > Add New Category
Repeat this process for all your business types. You will then be able to see it on the right hand side of your page.
Business Location
- Go to Businesses > Business Location > Add New Category.
- Add as many locations as you deem necessary.
- All you need to do is add in the Name of the location.
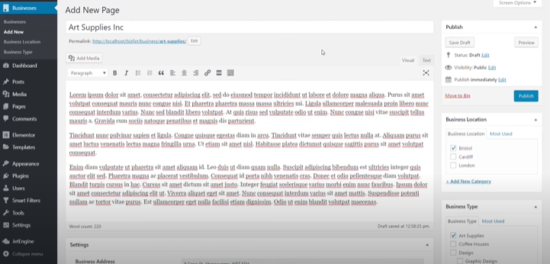
Step 5: Add New Business
Once you have set up your taxonomies, you can now go ahead and Add New Page under Businesses.
- Under page title and description, you will find all the taxonomies you have created.
- You will be able to choose your Business Type and Business Location from the categories on your right.
- Start by populating your page and choosing your taxonomies, Business Type and Business Location.
Then go ahead and publish your page. Once you have done that proceed back to Businesses and you will see your page, as well as business address, along the title and date it was published. Go ahead and add in a few more businesses/pages. In fact, add all of them in.
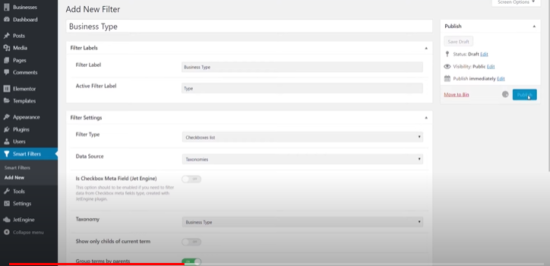
Step 6: Set Up Your Jet Filters
- Smart filters > Add New > Add New Filter Name: Business Type
- Filter label: business_type.
- Active filter label: Type
- Filter settings > Filter Type : Checkbox List
- Date source: Taxonomies
- Taxonomy: Business type
- Enable Group terms by parents.
- Then proceed to publishing.
Now you have successfully created your first filter and can proceed to creating your other filters, such as Business Location and follow the same process.
Step 7: Create a Listing Item
- Got ot Jet Engine > Listings > Listing Items > Add New.
- Setup Listing Item > List Source > Posts > Listing Item Name: Business Loop Listing > Create Listing Item.
- Next go into Elementor > General Settings > Listing Settings > Listing Source : Posts > From post type: Business > Post Width: 350
- Then go back to the Elementor Widgets and scroll down until you see a section called Listing Elements.
- Drag and drop a Dynamic Image.
- Drag and drop a Dynamic Field– this will pull in your business information.
- Once you’re done doing this, you can either duplicate the information and then swap out the content or start from scratch.
- You can then style your listing elements and then save.
Step 8: Setup Your Theme Builder
- Exit the Elementor Dashboard and jump back to the template section.
- Then proceed to Templates > Theme Builder > Archive > Add New Archive > Choose Template Type > Name Your Template: Default Archive: Business Type > Create Template.
- You will then be taken into Elementor where you will be able to set your listing and style accordingly.