Have you seen Elementor?
Our flagship product, Layers has been acquired by the team at Elementor.
With a powerful, fast page builder, Elementor is the best way to get your site online with as little effort as possible.

This theme has been retired and is no longer being actively developed. Don’t worry, it should still work for some time and will continue to receive critical updates for up to one year from your original purchase date. Learn More Here
The Clean Cut widget-driven home page is designed to use widgets for the home page layout. If you are not using the widget-driven layout, you may skip the Slider and Home Page Panel sections.
Access your Widget admin area under →
Under the Widgets Section you will see the following panels:
Each widget area specific to your theme has been color coded to make setup easy. Simply drag the widgets you need into the corresponding panels. For new WordPress installs, you may need to drag out any default widgets.
At the top of the page you will find a yellow ribbon containing a handy “Click Here” link, which will display the recommended widget setup in case you get lost.

Below is an explanation of each widget and how to configure it.
Slider
Drag the blue Slider widget here. Any other widgets placed here may not format correctly.
(Obox) Slider – Clean Cut eCommerce child theme version
The Slider widget in Clean Cut eCommerce 1.2.7 and higher shows posts by category, including Products. If you previously were featuring specific products to display, you will need to create a Product Category such as “Featured” and add future posts you wish to feature to that category. You may still feature products using the starring method for display in your Featured Product Widget.
(Obox) Slider
- Expand the slider panel and select a post type to display, then click Save
- Select a filter type and click Save
- Select a Category or leave the default (All) selected and click Save
- Select a number of slides to show.
- Choose whether to display videos or your featured image in the Thumbnails menu. If you prefer for thumbnails to display on video posts, select Post Feature Image here. You will need to upload featured images to your posts, or use oEmbed video links to auto-generate the thumbnails.
- Enter an auto-slide interval in seconds, or enter 0 for no auto-sliding.
- Click Save
Home Page
The Home Page Widget area accepts full-width orange Obox widgets, however the following widgets are specifically designed for this panel:
(Obox) Three-Column
Display various kinds of content in a multi-column layout on your home page.
- Add a title. If you do not want a title to be visible, enter a space in the title field.
- Select what type of posts to display and click Save
- Select a Filter type and clickSave
- Select your filter item or leave All selected and click Save
- Select a number of posts from the Post Count menu. Ensure you choose at least as many posts as columns you selected in step 2
- Choose whether to display videos or your featured image in the Thumbnails menu. If you prefer for thumbnails to display on video posts, select Post Feature Image here. You will need to upload featured images to your posts, or use oEmbed video links to auto-generate the thumbnails.
- Check Show Images to display the post featured image or video.
- Check Show Excerpts to display an excerpt from the post body.
- If Show Excerpts is checked, you must enter a Content Length (number of characters to show). Anything between 90 and 220 is best.
- Click Save
(Obox) Four Column & Two Column
These widgets work best in the “Footer Top” area, described below.
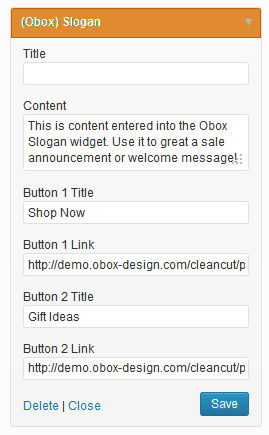
(Obox) Slogan
Use this widget to display an intro, slogan, sales announcement, or testimonial.
- Enter a Title
- Enter some Content. This acts as the body of the slogan, such as “This is the best website ever!”
- Enter the text for Button 1
- Enter the link URL for Button 1. (Include http://)
- Repeat for Button 2. Leave these fields blank to not show buttons.
- Click Save
(Obox) Services
This widget displays your Services in chronological order.
- Enter a Title
- Select the number of services to display in the Post Count menu
- Check Show Images to display the Service Icon, or leave unchecked to hide it
- Check Show Excerpts to display your Service Excerpt. If unchecked, just the service title will show, which links to the service on the services page.
- Click Save
Need Help with Services? Refer to Creating Services for how to setup your service posts.
Shop Sidebar (Handmade ECommerce Only)
This panel accepts any single-column (purple) Obox widgets, standard WordPress widgets (gray) or green WooCommerce widgets. For details on WooCommerce Widgets, visit the WooCommerce Documentation.
If you choose to use the WooCommerce Product Search widget, it must be placed in the bottom position (last)
Sidebar
The sidebar accepts any single-column purple or default gray widgets. If you are using WooCommerce, you may also use any green Woo widgets here.
Below are details on configuring Obox widgets. For help with default widgets, visit the WordPress Codex. For Woo Widgets, visit the WooCommerce Documentation.
(Obox) Twitter
Display a simple feed of your latest Tweets.
- Enter a title such as “Follow Me on Twitter”. This title will link to your profile.
- Enter your Twitter ID without the @
- Select the number of Tweets to show.
- Select whether to display Replies/ Retweets
- Click Save
(Obox) Comments
Display the latest comments with a short excerpt and link to the post. This differs from the default WordPress widget in how it displays the information.
(Obox) Social Links
Displays icons linking to your social profiles. Enter the full URLs to your social profiles here. For the email field, enter your email address. For RSS, enter your RSS Feed Url or Feedburner URL.
(Obox) Search Box
Provides a styled search field.
(Obox) 125 x 125 Adverts
Displays any small adverts added using the Advert Manager
(Obox) Large Adverts
Displays any large adverts added using the Advert Manager
(Obox) Sidebar Thumbnail Slider
Displays featured images or videos from the selected post category in a sidebar-sized slider
Footer Top
This panel accepts full-width or orange Obox widgets. For Clean Cut eCommerce, you may also place 3 green (WooCommerce) widgets here. The following widgets were specifically designed for this panel:
(Obox) Four Column & Two Column Widgets
These widgets will display your posts in a four-column or two-column layout.
- Select the Category you would like to use.
- Enter the number of posts you would like to display in the Post Count menu.
- Choose whether to display videos or images in the Thumbnails menu. If you prefer for thumbnails to display on video posts, select Post Feature Image here. You will need to upload featured images to your posts, or use oEmbed video links to auto-generate the thumbnails.
- Check Show Images to enable images or videos to appear.
- Check Show Excerpts to enable a snippet of your post content and enter a character length (it should not exceed 120 characters or it won’t look good.)
- Check Show Continue Reading if you wish to display a Continue Reading link (recommended if Excerpts are enabled)
- Click Save
(Obox) Popular Posts
This section displays posts in a specially styled 3 column layout. Popularity is based on the number of comments the posts have received.
- Enter a Title
- Select a Post Category
- Select a Post Count
- Check Show Images to display the post thumbnail or video
- Check Show Excerpt to display an excerpt. If unchecked, only the image and title will show.
- Click Save
Footer
This block is designed to display red Obox and regular WordPress widgets (grey) such as Text, Latest Posts and Comments in three columns. You can place purple Obox widgets here also, however depending on the styling of some widgets, you may need to experiment to get the best layout. The red Contact widget was specially designed for this panel. View our demo for examples.
If you have Clean Cut eCommerce installed, you may also use green WooCommerce widgets here.
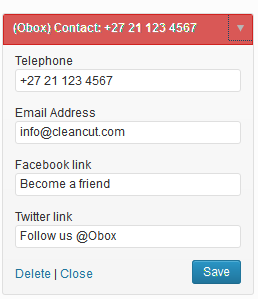
(Obox) Contact
- Enter your Telephone
- Enter your Email Address
- Enter the full URL to your Facebook page in the Facebook link field, or leave blank for none
- Enter the full URL to your Twitter profile in the Twitter link field, or leave blank for none